

Skip to content
GridPHP FrameworkGridPHP FrameworkGridPHP FrameworkDocumentation

Codeigniter Integration

Run create-project to create a new project:

Terminal window
composer create-project gridphp/ci4-starter my-app

Start local server by running:

Terminal window
cd my-app
php spark serve

Then open http://localhost:8080 in your browser.

OR, you can move my-app folder to your local web server’s root folder and use my-app/public as your site url. Example: http://localhost/my-app/public/

Output:

GridPHP CodeIgniter Integration

We used the Codeigniter4 starter as our base project. We further added following files for the quickstart:

  • app/Config/GridPHP.php: Bridge configuration connecting CI4 database settings to GridPHP.
  • app/Controllers/Home.php: Controller featuring master and detail grid methods.
  • app/Views/welcome_message.php: View file loading GridPHP styles/scripts and displaying grid output.
  • app/Config/Routes.php: Added routes for grid examples.
  • writable/db/database.db: SQLite database for sample data
  • public/gridphp/assets/: Published GridPHP front-end dependencies (JS, CSS, Themes).

By default, the database configuration is set to SQLite database in .env, it uses bundled SQLite sample database containing sample customers, orders and other tables.

database.default.hostname =
database.default.database = ./writable/db/database.db
database.default.username =
database.default.password =
database.default.DBDriver = SQLite3

Below are step-by-step walkthroughs demonstrating how to build a basic single-table grid (“Hello World”) and an advanced Master-Detail grid.

This walkthrough creates a simple, zero-configuration datagrid bound directly to a database table with no extra bells and whistles.

namespace App\Controllers;
class Home extends BaseController
{
public function index(): string
{
// Initialize GridPHP with CI4 database config
$g = new \jqgrid(config('GridPHP')->dbconf());
// Set table name
$g->table = 'customers';
// Render grid HTML and JavaScript snippet
$data['output'] = $g->render('my_first_grid');
// Pass output to view
return view('hello_grid', $data);
}
}

Ensure routes are registered both get and post for master and detail endpoint:

// for fetching data
$routes->get('/', 'Home::index');
// for CRUD operations
$routes->post('/', 'Home::index');

Include GridPHP scripts/styles in your view header and output $output:

<!DOCTYPE html>
<html lang="en">
<head>
<meta charset="UTF-8">
<title>Hello World Grid</title>
<!-- GridPHP Assets -->
<link rel="stylesheet" type="text/css" media="screen" href="gridphp/assets/themes/base/jquery-ui.custom.css">
<link rel="stylesheet" type="text/css" media="screen" href="gridphp/assets/jqgrid/css/ui.jqgrid.css">
<script src="gridphp/assets/jquery.min.js"></script>
<script src="gridphp/assets/jqgrid/js/i18n/grid.locale-en.js"></script>
<script src="gridphp/assets/themes/jquery-ui.custom.min.js"></script>
<script src="gridphp/assets/jqgrid/js/jquery.jqGrid.min.js"></script>
</head>
<body>
<div style="margin: 20px;">
<h2>Hello World Datagrid</h2>
<?= $output ?>
</div>
</body>
</html>

This walkthrough demonstrates a feature-rich Master Grid linked to a Detail Subgrid via an AJAX endpoint.

1. Controller for Master & Detail (app/Controllers/Home.php)
Section titled “1. Controller for Master & Detail (app/Controllers/Home.php)”
namespace App\Controllers;
class Home extends BaseController
{
// Master Grid Page
public function index(): string
{
$g = new \jqgrid(config('GridPHP')->dbconf());
// Configure Master Grid Options
$g->set_options([
'caption' => 'Customer Directory (Master)',
'multiselect' => true,
'subGrid' => true,
'subgridurl' => 'detail', // Subgrid AJAX endpoint
]);
$g->table = 'customers';
$g->select_command = 'SELECT customer_id, company_name, contact_name, city, country FROM customers';
// Column Formatters
$g->set_columns([
['name' => 'country', 'formatter' => 'badge'],
['name' => 'city', 'formatter' => 'badge'],
], true);
// Actions: Export, Edit, Delete
$g->set_actions([
'export' => true,
'add' => true,
'edit' => true,
'delete' => true,
]);
$data['output'] = $g->render('master_customers');
return view('welcome_message', $data);
}
// Detail Subgrid Endpoint (AJAX payload)
public function detail(): string
{
$g = new \jqgrid(config('GridPHP')->dbconf());
$g->set_options([
'caption' => '',
'readonly' => true,
'toolbar' => 'bottom',
]);
$g->table = 'orders';
// Filter detail records by rowid passed from parent row
$customerId = $this->request->getGet('rowid') ?? '';
$g->select_command = "SELECT order_id, order_date, shipped_date, freight, ship_name FROM orders WHERE customer_id = '{$customerId}'";
// Return raw rendered subgrid for AJAX injection
return $g->render('detail_orders');
}
}

Ensure routes are registered both get and post for master and detail endpoint:

// for fetching data
$routes->get('/', 'Home::index');
$routes->get('detail', 'Home::detail');
// for CRUD operations
$routes->post('/', 'Home::index');
$routes->post('detail', 'Home::detail');
<!DOCTYPE html>
<html lang="en">
<head>
<meta charset="UTF-8">
<title>Master-Detail Grid</title>
<!-- GridPHP Assets -->
<link rel="stylesheet" type="text/css" media="screen" href="gridphp/assets/themes/base/jquery-ui.custom.css">
<link rel="stylesheet" type="text/css" media="screen" href="gridphp/assets/jqgrid/css/ui.jqgrid.css">
<script src="gridphp/assets/jquery.min.js"></script>
<script src="gridphp/assets/jqgrid/js/i18n/grid.locale-en.js"></script>
<script src="gridphp/assets/themes/jquery-ui.custom.min.js"></script>
<script src="gridphp/assets/jqgrid/js/jquery.jqGrid.min.js"></script>
</head>
<body>
<div class="container" style="padding: 20px;">
<h1>Master-Detail Datagrid</h1>
<?= $output ?>
</div>
</body>
</html>

To start from scratch without the starter project, you can integrate GridPHP manually by following the steps below.

For this walk-through, we used:

  • GridPHP Framework 2.9
  • Latest version of CodeIgniter (v4+)
  • PHP 8 (can work on lower supported versions as well)

In this code we used MySQL, however you can use PHP DataGrid combination with almost all famous Database engines including Oracle, Microsoft SQL Server, DB2, Postgres, SQLite, Firebird, etc.
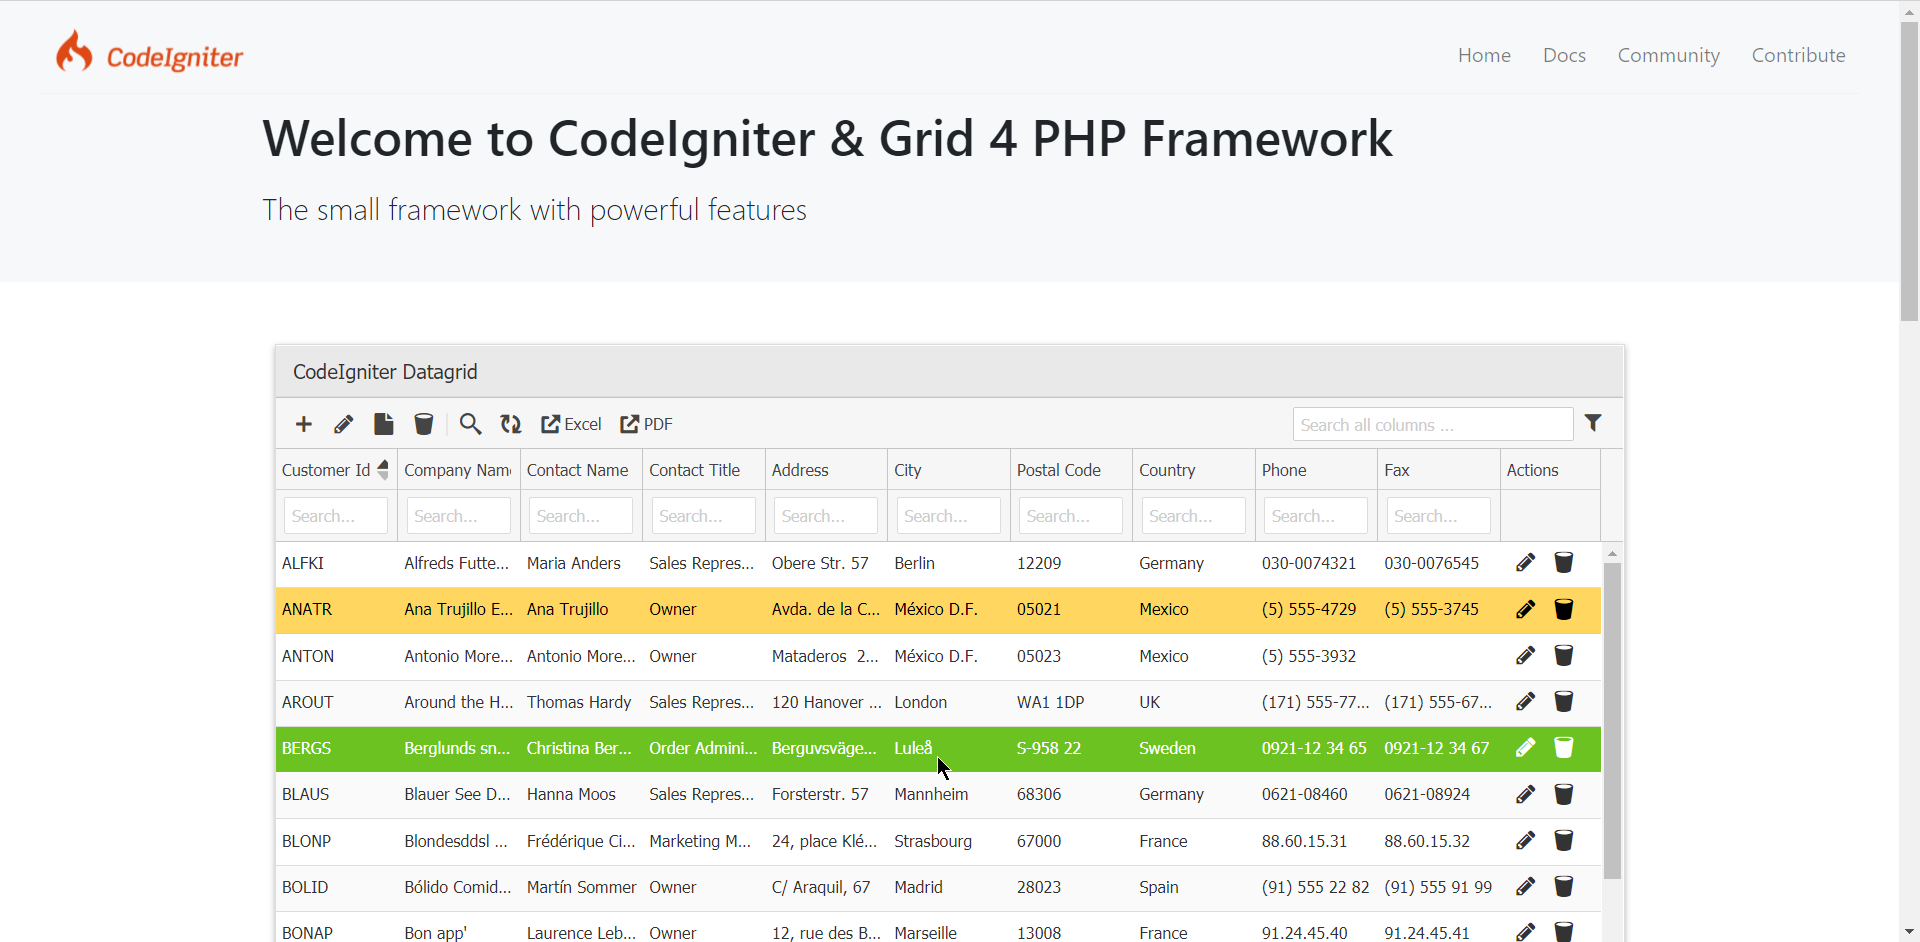
Steps to integrate are very simple.

  1. Download CodeIgniter

    Download CodeIgniter archive from Github repository and extract it in your public_html / htdocs / similar web public folder of your web server. Make sure it is showing the CI startup page.

  2. Download Grid4PHP

    Download the Grid4PHP archive from our website. You can either use free OR paid version, Comparison is available here. Free version provides basic essential functions for evaluation purpose.

  3. Extract in CodeIgniter Folder

    Extract the Grid4PHP archive and move the lib folder from archive to the public folder of CodeIgniter.

  4. Setup Controller

    Replace the code of CI’s Controller app\Controller\Home.php with this sample controller code.

    In Controller, make sure you set the database configuration (Line 9-14) and a table to fetch data (Line 25), according to your requirement.

  5. Setup View

    In View, include the JS and CSS files and echo variable passed from controller. CI’s View welcome_message can be replaced with this sample view code.

  6. Set Routes

    In Routes.php, Set both POST and GET routes for the controller function.

  7. Result

  • Getting “Whoops! We seem to have hit a snag. Please try again later”. If you see this message after setting up, please check the log file of CodeIgniter in “writable/logs” folder. It will tell the exact reason behind it.
  • Make sure you have “intl” and “curl” php extensions installed. They are required by CodeIgniter 4.